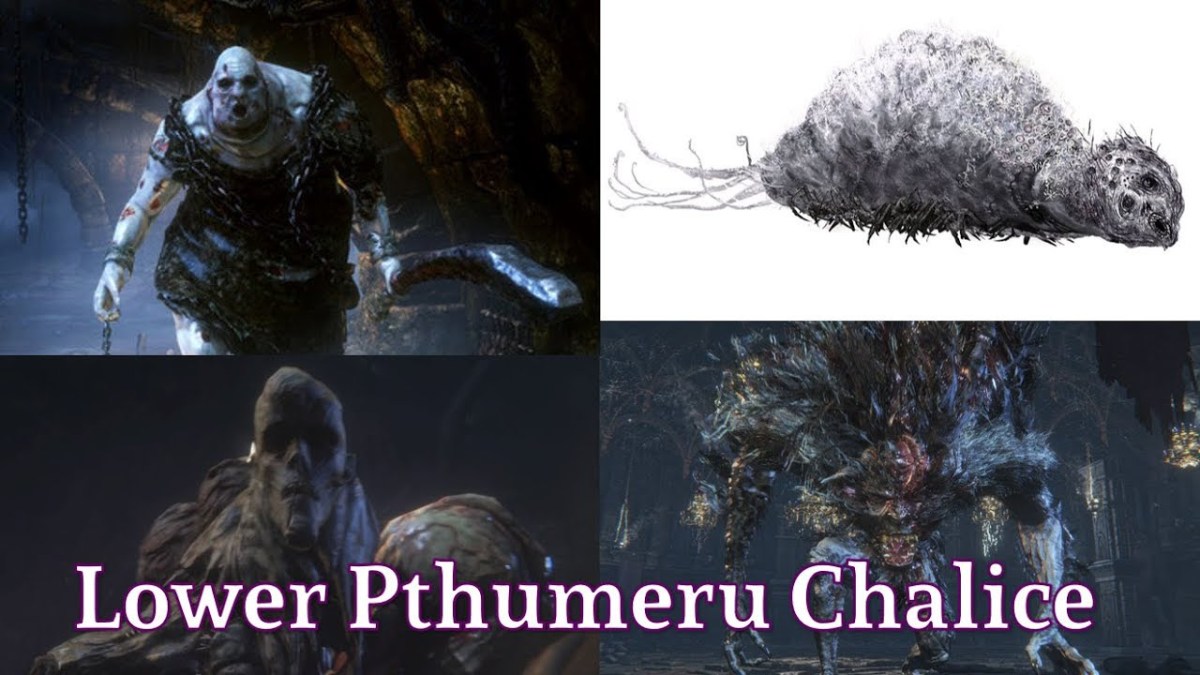
So you’ve manage Upper and Central Pthumeru and maybe dipped into Hintertomb. You might be feeling confident, like these dungeons might be manageable. This is going well so far!
I’m sorry. You’re about to be beaten up. A lot. It’s about to go from unfair to unashamedly mean really fast. I’ll help as best I can but if you make it to the other side… you are going to be a different person.
Merciless Watchers & Watcher Chieftan
Preparation
So you’ve seen these guys before, so remind yourself how you beat them last time. No other prep needed.
Tactics
This time around, the room layout is a bigger problem, and their health is up. It’s hard to escape from the blunderbuss, and getting one on their own is not going to happen.
Go in, and put one of the pillars between you and the gun. Until the end, you are going to stick to the outside, and you want to finish a move behind the next pillar behind you. Don’t bother swinging at first, just let the Merciless Watchers come join you around your pillar, then move to the next one along.
Move quick, turn to face the Merciless and let them cross the gap, stab them just before they get to your pillar. If they are running, back up and let them get their swing off and then strike. Just make sure you keep the pillar between you and gun. Regardless of how well the swing went, move onto the next pillar and heal if you have to.
And that’s it. Lead the Merciless on a merry chase and make the Chief’s attacks pointless, until he’s on his own, then go kill him.
Watch Out For
Doing this instead of going for gun first avoids being overwhelmed. The gun doesn’t do much, but it leaves you open to two wallops from his friends. Always backpedal and cover.
In Other Words
- Use the pillars.
- Lead the Merciless on a merry chase.
Undead Giant
Preparation
A giant pile of patience is needed.
Optional: you can see in the video that I had been tinkering with the cannon on my second playthrough. I’d upgraded it quite a bit, and its very fun, but I hadn’t found it that useful. I’ve barely used firearms at all, but here an upgraded gun is a good way of whittling down a boss that takes his time getting to you.
NOTE: This, for me, was it. The battle that decided whether I would claim the Chalice Playstation Trophy or give up. I fought this boss more than any other (at least 30), over three separate evenings, and did not see the light at the end of the tunnel for the longest time. After this, there may have been ‘harder’ bosses, but this was my tipping point.
Tactics
The tactic is simple, but it’s going to take time. It can come undone at any moment. This boss has big hits and insta-kill moves.
Stand before the giant, dodge back when he strikes, dodge in to him, swing, dodge away, repeat.
I preferred dodging in on the hook swing. The swing causes heavy damage, but a slight pause is guaranteed after the strike. The hammer (or is it a bin bag full of rocks?) might slam down once, but it might also slam down fifteen times, and the subsequent attacks come down quick.
Second phase, you’ll see a pustule form. Ignore it. It’s worth a lot of his health but going for it deliberately is unnecessary risk. Keep to the rhythm above, and if you’re using the biggest stick like I do, you’ll eventually clip it by accident.
Now, if you have a firearm you like, the cannon or rifle in particular, step back and empty it into the giant now. No point in doing this early on, but if you’ve got him past half health, given yourself space and thinning the remaining health bar is a good idea. I’ve heard some people make use of poison knives here too, but I find that ineffectual.
Watch Out For
If you are ever at the giant’s back, and even if you are at his side, get away. Flee. Spam dodge. If at any point he think you are flanking him he will suddenly spin, and that’s probably it for him. It is never worth being behind him, even if you see his weak-point pustule waving coyly at you.
If he spins in this phase, it is definitely over, which is why leaving the pustule alone is best. He also does a slam and a run and a step-and-swing. Let him do both and just back away without striking. The former has a shockwave which isn’t worth being close to, and the latter doesn’t happen enough to practice dodging and striking on rhythm (in my opinion).
Most importantly watch out for this guide. As you can see, when I won, something strange happened. My cannon strikes cause him to turn around. Suddenly, all my advice went out the window as he presented my his weak point and I went for it. Not something that you can plan for, but I took advantage. So whilst I essentially beat him with the tactics above, I can 100% confirm they’d get me through the whole fight.
In Other Words
- Bait and stab. Again and again
- Get from behind him fast
- Fire all projectiles in phase 2
Rom, the Vacuous Spider
Preparation
Fighting Rom in the main game is your practice. Also, lightning paper.
Summoning a friend might help. I brought one along, I think they helped… maybe… jury’s out.
Tactics
Another clone, with more health and scenery blocking the way. Unlike the Undead Giant, this fight immediately felt doable but proved full of niggling little frustrations. It was also full of niggling spiders.
NOTE: it was at this exact point, I realised I never published my guide for original ROM. So I’ve gone and fixed that. If you’ve finished that fight, you are almost ready for this one…
Thinning the spiders out at the start ‘felt’ like it helped, and having a friend there seemed to offer some distraction, but the difference from original Rom is that the spiders aren’t going to be in his orbit as much. They are all over the place. So my original strategy (if you can call it that) applies here more than before.
Clear enough spiders out that your first dance with Rom is uninterrupted. Unlike his predecessor, Rom is going to be more wiggly, so you want to maneuver him back into a corner. Then, as before, apply all the pain you can to your weapon and start swinging. One handed attacks allow you to get in extra hits as he teleports.
As before, you are going to start running now and never stop. Unlike the original, you can’t run a wide circle, but instead you are making a more chaotic winding way around the arena. When you have dodged a meteor drop by roll-spamming, run in to Rom’s tummy where spiders are light. Give him a bop or two then leave. Repeat.
I found this time that if I was up on him and he went on his back, the splash damage didn’t get me. I was too close. So I got in an extra attack or two. If he teleports when you are near him get another attack in before he goes.
Watch Out For
There’s a lot of running. If the spiders are webbing you, do not engage Rom. If you are missing any health, heal before engaging because the meteors can take a lot from you.
The main thing is to not lock onto anything so you can keep spiders in your peripherals as you approach.
In Other Words
- Do as you did with OG Rom.
- Never stop serpentining
Preparation
Fire paper.
I found the distraction of the summon useful here.
Tactics
Now I did this first try, somehow, so take what I say with more of a pinch of salt than you would normally. Whatever I did worked but you couldn’t call it strategy. I’m actually going to talk about what I would have done, on reflection, as much as I’m going to talk about what I did.
So the legs are the best bet, but the head takes more damage. So on my run I went to the legs, but should have been more confident. You can dodge forwards passed a lot of his attacks and go for his knees, and you can follow him when he hops back.
What I could/should do is notice that his head drops a lot when he’s hurt. He pauses, and gives time for a swing. Hit him quick and heal after, not the other way around, take the shot when he offers it. There might have been a visceral in there but I never found it.
Having the distracting summon in there made hitting the legs easier. I would also not lock on if I did this again.
The main thing is to get stuck in, on legs or face, and heal to full whenever you are hurt. He doesn’t like you being under him, so he’ll hop back a lot, which gives you space to heal.
Watch Out For
There was one punch he did then rocked my world. Through a pillar. If I had been anything but full health I would have been done for. He only seemed to like doing it when I was far away, so staying near or under him is better.
Compared to the Giant and Rom-again, this felt a lot more straightforward. Attacks are big but slow, easier to read. The risk is that you’ve got to weave through to him legs or time hitting the head, and this can come undone quickly. The best strategy, or the one I fell into, was to just accept the hits, heal through the damage and keep going at him.
In Other Words
- Get up on his legs
- Hit the head when it hangs down
- Keep health high/full
Keep on Hunting!
Want help with other Bloodborne bosses? Click Here!


